Thursday, February 3, 2011

Apple TV, Generation Two: Thumbs Up (w/ Reservations)!

"The all-new Apple TV" is a lot better than Apple's Gen One product. The $99 device does a lot more (see below), it's a lot cheaper, and it's ultra-easy to set up.

It sits in the palm of your hand until you hook it to your HDTV via an HDMI cable (not included). Plug it in via the included power cord and set the TV to the proper input, and you instantly have a picture.


The first picture you see on the TV screen asks you to use the included remote to select English (or whatever language you prefer).

Next, you see on the TV screen a list of WiFi networks from which Apple TV wants you to select one to join. You choose your network and enter a password if needed.

You then go to iTunes  on your computer and turn on Home Sharing (Advanced menu -> Turn On Home Sharing). After you type in your Apple ID and password and click Create Home Share, all you have to do is click on the Done button.

Back at the Apple TV, you then use its remote to navigate to Settings > Computers, choose Turn On Home Sharing, and use the onscreen keyboard to enter your Apple ID and password.

That's it! Your computer will now show up under Computers in Apple TV's main menu. Just choose it, and you'll see on the TV screen a list of categories (Music, Movies, TV shows, etc.) that give you access to all your streamable goodies. The Apple TV is in business ... and you don't even have to tell iTunes to sync content to it.

That's because the new Apple TV does not have an onboard hard drive or any other kind of storage. You can't sync content to it. Everything it plays is streamed to it.

It streams any content which your computer's iTunes app has to offer — music, movies, TV shows, podcasts, photos, etc. Right out of the box, I tried Apple TV with iTunes movies and found it worked smoothly, much more so than my Gen One Apple TV ever did. One thing I liked especially: when you fast-forward through a movie, the new Apple TV lets you move into material that it has yet to buffer. The screen goes dark, but the time indicator at the bottom of the screen shows you exactly where you are. When you get to the point in time at which you want to resume play, you just press the remote's Play button and regular Apple TV streaming with picture and sound resumes instantly from that very point.

You can buy or rent movies and TV shows from the iTunes Store and watch them instantly. You can watch Netflix Instant streams and screen YouTube videos. You can listen to Internet radio. You can search for and view Flickr images. (Yet the new Apple TV doesn't do Pandora or Rhapsody!?!)

At the App Store, Apple offers an iPhone/iPad/iPod Touch app called Remote that lets your iDevice stand in for the Apple TV's remote control. One advantage: you don't have to be in the same room, so you can control (say) what track or playlist is playing while you are dicing onions in the kitchen. (Don't forget to wipe your hands first.)

Apple's promotional AirPlay image
I bought the new Apple TV for its highly touted audio/video AirPlay capability. When you're playing music or videos in the iPod app on your iPhone or other iDevice, you'll see:


Tap the AirPlay icon seen at the right of the row of controls in the image above, and a menu pops up on the screen of the iPhone (or whatever iOS-based iDevice you're using) allowing you to redirect both audio and video to "Apple TV" (unless you've gone to the trouble to rename the device more descriptively). Like magic, the picture and sound start playing right on your TV, via the Apple TV. Technically, what's happening is that your iDevice is "pushing" the content to the Apple TV, which accepts and plays the content in the same way as it would if the Apple TV itself were "pulling" the content from iTunes on your home computer.

You can even use Apple TV's remote to do things like pause and resume playback, fast forward and reverse, go forward and back a chapter at a time, etc.

It's a neat trick, and it even works for YouTube. But — and this is my biggest gripe — for most other iDevice video players, including QuickTime running in Safari, it only forwards the audio, not the video, to the Apple TV. The video keeps playing, but it's on the little screen of the iDevice.

I was hoping to (see The Marvelous Air Video App: It Streams Videos from Your Mac or PC to iPhone/iPad/iPod Touch) get the Air Video app to do the AirPlay thing with both video and audio. No such luck. It forwards only the audio to the Apple TV. (Or maybe it is forwarding the video, but Apple TV is ignoring it.)

It's not a deal breaker, and I'm not going to return my new Apple TV for a refund. Yet it's an ugly fly in the ointment. Why in the world would Apple not get the AirPlay icon working identically for all video apps?

Here's more coverage of AirPlay with Apple TV, including more information about the flaw:


CNET's review of the new Apple TV was filed before Apple delivered on its (at that time) still-promised AirPlay capability, so it doesn't mention the flaw ... but the review is still well worth reading.

BTW, a like anomaly is that you can use AirPlay to "push" photos stored on your computer to the Apple TV ... but AirPlay won't do the same for iPhone-shot photos and videos that are still stored on your iPhone.

You can use iDevice-based apps such as Pandora and Rhapsody to fill in for such capabilities as are regrettably missing on the Apple TV itself ... but the Apple TV will irritatingly display "Unknown Artist" and "Unknown Track" for music sent to it from such third-party music apps.

And, on the plus side, when you can get AirPlay to stream videos or audios properly from iDevice to Apple TV, you can then proceed to use your iDevice for other purposes such as browsing in Safari. AirPlay does its magic "in the background" on the iDevice.

What no one seems to know is whether the current glaring AirPlay-to-Apple-TV insufficiencies can simply vanish if Apple updates its iOS operating system that runs the iDevices, and/or the Apple TV software itself. If not, then app developers might have to re-jigger their apps to get it all working right ... not optimal, from the point of view of impatient users like me.

Or ... will this turn out to be a permanent gap between the ideal and the real, along the lines of iDevices' lingering inability to play Flash web videos?

Wednesday, February 2, 2011

The Marvelous Air Video App: It Streams Videos from Your Mac or PC to iPhone/iPad/iPod Touch

Air Video is a wonderful thing. It lets you watch your videos anywhere.

True, you need to be carrying an iPhone or iPad or iPod Touch. Air Video is an app for Apple iOS-based devices.

Air Video will stream videos from your Mac or PC to your iDevice. The videos can be in almost any format: .mp4, .m4v, .mov, .avi, .wmv, .asf, .mpg, .mpeg, .mkv, .3gp, .dmf, .divx, .flv. So if your video file has any of those geeky abbreviations as its filename extension, Air Video will probably play it.

The secret formula is that Air Video will do "live conversion" of videos in formats which the iDevice can't ordinarily play. For example, an iPhone can't play an .mpg video ... but Air Video can!

Air Video will not play DRM-protected videos that you buy at the iTunes Store. To play one of those, Air Video will ask you if you want to open it in Safari on your iDevice. If you agree, the video will play in your iDevice's version of Apple's QuickTime engine. This happens courtesy of a handoff of the video by the Air Video app to the Safari app on the iDevice ... but only if the iDevice has been authorized to play your DRM-protected videos.

Air Video playback on an iPod or iPhone looks like this:


The Air Video app is fed by the Air Video Server running on a Mac or PC. On my Mac, upon being launched for the first time it installed itself as a Login Item that starts up each time my computer is booted, and then put its mini-icon in my menu bar:

Air Video Server's mini-icon is at left.

Air Video Server Preferences

When Air Video Server is running in the background on my Mac, as it normally does, an item in its mini-icon's drop-down menu lets me view and modify Air Video Server's Preferences:

Air Video Server's "Shared Folders" Preferences Tab

Air Video Server's "Shared Folders" preferences tab allows you to tell the server which of your Mac's folders (and all nested subfolders thereof) contain videos you want to stream to the Air Video app on your iDevice.


Remote Access

If you want Air Video to work when you are not at home and using your own WiFi network, you have to set up Air Video Server's "Remote" Preferences:


Air Video Server's "Remote" Preferences Tab

This is where things can get tricky! A full rundown on how to do it can be read here.

Crucial to remote connection is This Server PIN. Mine (see above graphic) is 8** *** **5. (I am showing it here with asterisks replacing seven of the actual numbers so that online malefactors won't "steal" my video streams.) 8** *** **5 appeared as if by magic when I checked Enable Access from Internet.

Once I have my PIN, I simply can ...


... in the Air Video App on the iPhone. (I cribbed that image from the page I gave the link to earlier; it uses a different PIN than my own 8** *** **5.)

My WiFi router features NAT-PMP (which stands for "Network Address Translation - Port Mapping Protocol") support — but not UPnP (which stands for "Universal Plug and Play") support. Whatever those terms mean to true geeks, my home router's NAT-PMP support means to me that Air Video Server is telling my router the following: whenever the Air Video app on my iPhone asks for access to my PIN, send the request on to be honored by the Air Video Server, running on my Mac, itself. If I didn't check Automatically Map Port and get a PIN, that wouldn't happen.

If I had a router that lacks NAT-PMP or UPnP support, I'd have to do manual "port forwarding" to get Air Video to stream videos to my iPhone when I'm away from home. So it pays to have a router with NAT-PMP or UPnP support.

By means of the PIN, Air Video's away-from-home remote access works when you are at a WiFi hotspot. If WiFi is unavailable and your iDevice can get on the 3G cellphone network, remote access still works!

Full disclosure: though Air Video remote access works from almost wherever you are, if the network connection you are using is too slow, it may not work smoothly and reliably. Playback may start and stop and start and stop and start and stop ... . Remember, you've been warned!


Monday, January 31, 2011

Movies: TiVo to Mac to Apple TV & iPhone (Part II)

In Movies: TiVo to Mac to Apple TV & iPhone (Part I) I show how I move old movies cablecast on Turner Classic Movies HD from my TiVo Premiere to my Mac, via my home WiFi network, and then convert them to a video format which can be used by iTunes in order to feed my Apple TV.

What happens if I want instead to feed the movie to an iPhone?

In Movies: TiVo to Mac to Apple TV & iPhone (Part I), software called ImTOO HD Video Converter 6 (HDVC) converted my Gigi MPG.mpg movie file — the original TiVo recording, moved to my Mac and no longer DRM-protected — from its original MPEG-2 digital video format to the MPEG-4/H.264 digital video format. The output file was made by HDVC in a manner suited to an Apple TV — including the use of honest-to-goodness high-definition (HD) video in the output file.

But an iPhone can't and won't use the same MPEG-4/H.264 video output file as is appropriate for the Apple TV. The iPhone's small touchscreen is incapable of all that wonderful video resolution, and its onboard processor can't keep up with decoding an HD file's high bitrate. In fact, iTunes will simply refuse to sync the HDVC HD output file to an iPhone.

To get an output file that will sync to an iPhone, I need to use a different HDVC profile and make a second MPEG-4/H.264 copy of the movie:

Selecting iPhone - H.264 Video Profile

I select HDVC's built-in iPhone - H.264 Video profile in the graphic above to get:

HDVC Set Up for Converting for iPhone

That profile would make the output video use Zoom: Letterbox — see the setting just above the little Preview window — which is not ideal. Better I should use:

Using Zoom: Full Instead

Zoom: Full (Keep aspect ratio), which is now the Zoom: setting shown just above the small Preview window in the graphic above, is a better choice because the movie as originally recorded in my Gigi MPG.mpg movie file has a widescreen Cinemascope image. The film frame's aspect ratio is wider than that implied by Video Size: 480x320.

Below, I show how HDVC can actually Preview its output image and thereby see what Zoom: Full (Keep aspect ratio) does:

Preview shows black bars at top and bottom

The black bars at top and bottom in the little image Preview window just below the Zoom: Full (Keep aspect ratio) selection are actually encoded into the output file — a waste of precious Bitrate.

If Zoom: Letterbox is used, the black bars get yet bigger:

Letterbox bars bigger with Zoom: Letterbox

So with Zoom: Full (Keep aspect ratio), there are fewer "black bar bits" cutting into the useful Bitrate of the video in the output file.

Unfortunately, the "image itself" as recorded from the TCM HD cable channel already contains the vertical black bars seen at left and right of the film frame in the Preview. They can't be removed. Also, even with Zoom: Full (Keep aspect ratio) there are some "black bar bits" above and below the image in the Preview. I don't yet know how to get HDVC to eliminate those entirely.

I can at least, though, save a new, user-defined profile that in the future I can use to automatically select Zoom: Full (Keep aspect ratio) for iPhone - H.264 Video output:

Saving an HDVC Profile

I simply click on Save As... and enter the profile name iPhone - H.264 Zoom Full, then click OK. After I do that, I can ...

Selecting the new Profile

... select my new Profile whenever I want to use it. Now the main HDVC window becomes:


New Main HDVC Window

Profile: iPhone - H.264 Video Zoom Full confirms that the new profile is is use. This profile employs Zoom: (Keep aspect ratio), exactly as intended.

Keep in mind that my going to all this trouble to remove a few "black bar bits" from iPhone-compatible output video is strictly optional on my part. You do not have to follow suit, if all you want is to get usable iPhone-compatible output.

Here is QuickTime Player's rendition of the Zoom: Letterbox video output with the extra "black bar bits" in it:

"Letterbox" Version of the Gigi Image in QuickTime

Below, the extra "black bar bits" have been avoided by means of using Zoom: (Keep aspect ratio):

"Widescreen" Version of the Gigi Image in QuickTime

Not only are the top and bottom bars smaller, the image itself shows up as wider. This is so despite the fact that both images have a nominal Video Size of 480x320 pixels!

How does this magic happen? The pixels in the "widescreen" version have been "squeezed" horizontally by HDVC, and QuickTime simply expands the pixels' width to make the image seem wider. And so does the iPhone, which, after all, uses QuickTime.

The experts call this kind of "squeezed-pixel" encoding of the video image "anamorphic." When the image is instead enclosed in a "letterbox," the pixels are not "squeezed" horizontally, and the player won't "unsqueeze" them for a wider aspect ratio.

One advantage of using anamorphic encoding rather than  letterbox is that the playback image on an iPhone can be expanded slightly by double-tapping it — albeit with the sides of the image being cropped. A letterbox image cannot be so expanded on an iPhone.

Whether or not you use anamorphic encoding in your iPhone-compatible output from HDVC, the file that HDVC creates is quite small. My high-definition input file for Gigi was 8.42 gigabytes in size. The iPhone-compatible anamorphic output file used only 968 megabytes. The output file is only 11.5 percent of the size of the original file! I can get over eight of those iPhone-compatible output files in the same hard drive space as the original file takes up!

Sunday, January 30, 2011

Movies: TiVo to Mac to Apple TV & iPhone (Part I)

I like to use my TiVo Premiere DVR to record old movies shown on Turner Movie Classics HD. Then I like to transfer the recordings from the TiVo to my Mac to be kept forever. Once they are on my Mac, I like to to add them to my iTunes library, then stream them from iTunes to my Apple TV. I like to be able to watch them on my iPhone as well.

There are ways (often, multiple ones) to accomplish each step. That's the good news. The bad news is that in the past I've run into some pretty hefty stumbling blocks in trying to accomplish one step or another.

One of the main sources of difficulty is that the TiVo records programs in one digital video format, while the Apple suite of products (iTunes, Apple TV, iPhone) prefers another.

The TiVo records programs in a format called MPEG-2, which is indeed the video format that is used by digital cable channels, TCM-HD included. It doesn't matter whether the channel is standard definition or high definition; the digital video is MPEG-2.

Apple products for the most part insist on a different digital video format, MPEG-4, and in particular a variety of that format called H.264. MPEG-4/H.264 can store video using far fewer megabytes than MPEG-2.

In theory, it's easy enough to convert MPEG-2 video to MPEG-4/H.264. In the past, though, my efforts to do so have yielded displeasing results. The tools I've used have tended to be way, way too slow to suit me; or they haven't worked at all; or they've produced output video that's missing audio; or the output was flawed in some other way, such as having the wrong aspect ratio. ("Aspect ratio" is the ratio of image width to image height.)

I think I've finally found a tool to do the MPEG-2-to-MPEG-4/H.264 transcoding swiftly and properly, ImTOO HD Video Converter 6. I'll give a rundown on it later.


TiVo to Mac (and Back to TiVo)

To move TiVo recordings to my Mac I use kmttg. It's a Java-based application that harnesses so-called "TiVo To Go," a capability that's been built into TiVo's operating software for years now. Using kmttg is pretty easy to master, though initial setup is a bit of a pain and then there is a subsequent learning curve. I go into detail about kmttg in Archive HDTV Recordings to Your Mac, Then Stream Them Back to Your TiVo!.

Once you have transferred TiVo programs to your Mac, you can (optionally) delete them from the TiVo itself, then watch them at your leisure by streaming them back to the TiVo. In Viva pyTivo! I detailed how to use the freeware pyTivoX app to send media content back from a Mac to TiVo units.

To use kmttg and pyTivoX you need a home WiFi network (unless you want to run Ethernet cable twixt Mac and TiVo!). To get suitably high WiFi speeds, you need the TiVo to be one of the recently introduced TiVo Premiere models, and it should be using TiVo's new wireless-N network adapter. See TiVo Premiere Is Here! and TiVo Wireless-N Adapter: First Impressions. Your home network should likewise be capable of 802.11n wireless speeds.

Additionally, your home WiFi router should be "dual mode" — capable of running at slower 802-11g speeds, since an iPhone will not connect at "n" speeds, and neither will an Apple TV. (At least, my iPhone 3GS and my first generation Apple TV are not "n"-capable.)

Keep in mind, moreover, that archiving TiVo recordings on a Mac requires a lot of hard drive space, particularly if you, like me, want to archive high-definition 1080i or 720p recordings. For purposes of testing out the capabilities of ImTOO HD Video Converter 6, I've been working with an HD copy of the 1958 musical film Gigi that is about 1 hr. 55 min. long and takes 8.42 gigabytes on my (external USB) hard drive. That's over 4 GB per hour of movie!


Into the iTunes/Apple TV/iPhone World

Just being able to archive TiVo recordings on the Mac and stream them back to the TiVo is a nice thing. But I'm greedy; I want to be able to move those recordings into Apple's iTunes/Apple TV/iPhone suite. That means converting them from MPEG-2 to MPEG-4/H.264.

Before I can hope to convert them, DRM must be stripped from the Mac-archived version. "DRM" refers to "digital rights management," a euphemism for copy protection. Everything a TiVo records is copy protected. TiVo To Go as used by kmttg honors the copy protection, so the first copy made on the Mac, though in the MPEG-2 format, is DRM'ed and supposedly cannot be used by software that TiVo Inc. doesn't authorize.

However, kmttg gets around the DRM problem by then making a second copy of the video that is in the unprotected MPEG-2 format. The first, DRM-protected version of the file has a filename with a .TiVo extension. The second, unprotected version has a filename with a .mpg extension. (kmttg optionally deletes the .TiVo file, leaving just the .mpg file.)

For example, if I record Gigi from TCM HD on my TiVo and use kmttg to archive it to my Mac, I wind up with a file on my Mac's USB hard drive called Gigi.mpg. (The actual filename can be kmttg- amplified by appending, for instance, the date and time of the original TiVo recording, but I'll skip over such niceties here.)

Once I had Gigi.mpg — actually, the file wound up with the redundant name Gigi MPG.mpg — I could use ImTOO HD Video Converter 6 on it. I'll refer to that software as HDVC for short. HDVC costs $49.95. You can download it and try it for free, but the free version will encode only three minutes' worth of a movie.

HDVC installs in your Applications folder and, when launched, puts up a window like this:

HDVC Converter Window


When you are just starting out with HDVC, you'll first want to focus on the Browse... button next to the Destination: file path. That's how you'll select the folder to put the output of your movie file conversions into.

Then you'll want to click on the Add Files icon:


It will bring up a dialog in which to choose the (in my case) Gigi MPG.mpg file. The file will show up in the main part of the window, and it should have a check mark at it's left. (If not, manually click on the check box.)

Next, you'll want to select a profile by clicking on the blue up/down arrows for Profile:. In the image above, I've already selected the Apple TV - H.264 HD Video profile. Here's how I did it:

HDVC Profile Chooser


What's a profile? See all the items listed in the column at the right of the first image above — items such as Video Codec, Video Size, Bitrate, Frame Rate, Level, and Zoom? Taken together, they and several more that would be rendered visible by scrolling the column down serve to determine what kind of output HDVC will make.

For instance, Video Codec = H.264/MPEG-4 AVC determines that the output will be in that particular digital video format and not, say, another well known digital video codec, WMV. ("Codec" is short for "coder-decoder" and refers to the specific way in which the pixels of video information are stuffed into a computer data file and then expanded again when the video is played.)

When, in the Profile Chooser image, I select Apple TV in the left column and then Apple TV - H.264 HD Video in the right, I'm choosing the profile items shown in the Converter Window image. Simple as that!

If I want, I can then override any of the items. Here's what happens to the Converter Window if I manually change the Zoom: item from Letterbox to Full: (Keep aspect ratio):

HDVC Converter Window with Zoom: Full


The following paragraph talks about why I originally did that ...

The default value, Letterbox, means HDVC will take the ultra-wide Cinemascope image of the Gigi MPG.mpg file and add black letterbox bars at top and bottom. In other words, a lot of useless black pixels will be forced into the video. To avoid that, I change the Zoom: item from Letterbox to Full: (Keep aspect ratio). Once I do that, HDVC is smart enough to just encode the actual image itself, and to do so in such a way that the playback device (such as an iPhone or Apple TV) will add the letterbox bars only at playback time. This means that HDVC's output can devote all of its Bitrate: to giving the highest-quality picture possible in terms of how the image looks on a big TV screen.

... but my experiments showed that changing Zoom: for the Apple TV - H.264 HD Video profile made no difference to the output file created by HDVC! In Part II of this series I'll talk about creating HDVC output for the iPhone, and in that case changing Zoom: does make a difference. But for Apple TV - H.264 HD Video, changes to Zoom: are useless. Which is good, because it means you can just "set it and forget it," if you are creating output for the Apple TV. Just select Apple TV - H.264 HD Video and then ...

... once you have everything set up to your satisfaction, just click on the Convert Checked Items icon:


Now the Converter Window looks like this:

HDVC Converter Window During Conversion

The bottom line of the window tells how much of the conversion has been completed, how much time remains, how much time has elapsed, etc. In my testing, converting the Gigi MPG.mpg file takes less than four hours, depending on the profile used. That's lightning fast, compared with other converters I've tried!

Tuesday, January 25, 2011

Stream iTunes Movies from Mac to iPhone Safari

Don't want to sync iTunes movies to your iPhone? You can stream them from your Mac's iTunes movie library to your iPhone and play them right in Safari!

I cribbed the way to do it from here and here. Both of those web pages copied the procedure from an Embraceware blog post that is apparently now gone. I'll modify the procedure to fix typos, make it easier to use, make it clearer, and make it current:

Step 1: Open Sharing in System Preferences on your Mac and enable Web Sharing. This will turn on the built-in web server that comes in Mac OS X. Under Your computer's website in the Sharing Preferences panel you will now see a URL containing an IP address. Mine is as of this writing http://10.0.1.12/. Later on in this post, I'm going to change that ... but never mind for now. Whatever your computer's URL is, make a note of it now.

This IP address (in my case, 10.0.1.12) is known only on your local home WiFi network. It won't work on your iPhone if you're not at home. (I'll talk about how you can stream your movies from a remote WiFi hotspot later in this post.)

Step 2: On the Mac, open the Terminal application (located in the /Applications/Utilities folder) and type the following:

cd /Library/WebServer/Documents/

and press Enter. (Note the space after cd.)

Step 3: Locate iTunes' Movies folder on your Mac. Mine is /Volumes/Songcatcher 2 2/Users/songster/Music/Main iTunes Library/iTunes Music/Movies. One way to locate yours: select Movies under Library in the main iTunes window, then right-click or control-click on any movie and choose Show in Finder from the pop-up menu. A Finder window will typically open on your entire Movies folder. Leave this window open until you are done with this entire set of steps.

Step 4: In Terminal, type the following:

ln -s [fully specified path to your iTunes Movies folder] Movies

An easy way to do it:
  1. In the Terminal window, type ln followed by a space.
  2. Type -s followed by a space.
  3. Switch to Finder to reveal again the Movies folder window opened in the previous step. Drag the icon at the top of the window (in my case and probably in yours, too, its name is "Movies") and drop it right onto the Terminal window. 
  4. Type a space and then type the word Movies.
  5. In my case, the text I saw in the terminal window at this point was: ln -s /Volumes/Songcatcher\ 2\ 2/Users/songster/Music/Main\ iTunes\ Library/iTunes\ Music/Movies Movies.
  6. Press Enter.
Doing that does not — repeat, does not — produce any output in the Terminal window. What it does, it does behind the scenes.

Notice that there are '\' (backslash) characters in /Volumes/Songcatcher\ 2\ 2/Users/songster/Music/Main\ iTunes\ Library/iTunes\ Music/Movies. They're put there automatically when you drop the "Movies" folder's icon onto the Terminal window, so that Terminal won't be confused by any space characters embedded in the fully specified path to the Movies folder.

The last word in the string


ln -s /Volumes/Songcatcher\ 2\ 2/Users/songster/Music/Main\ iTunes\ Library/iTunes\ Music/Movies Movies

is (that's right, you're not seeing double) Movies. It could just as easily have been something else, like MyMovs. I'll call it an "alias," since what the ln -s command does is create a "symbolic link" between that alias and /Volumes/Songcatcher\ 2\ 2/Users/songster/Music/Main\ iTunes\ Library/iTunes\ Music/Movies. A symbolic link and an alias are roughly the same thing. In this case, the symbolic link or alias will allow a browser such as Safari to substitute in a URL the single word Movies for the humongous string /Volumes/Songcatcher\ 2\ 2/Users/songster/Music/Main\ iTunes\ Library/iTunes\ Music/Movies.

Step 5: In Safari on your iPhone, manually type into the Web address field the URL for your Mac's shared website. Mine is http://10.0.1.12/. Then type in (without an intervening space) your alias from above. Mine is Movies. Result, in my case: http://10.0.1.12/Movies. (This is where using an alias really comes in handy.) Now hit "Go" on the iPhone's on-screen keyboard. If all goes well, you'll soon see on the iPhone screen something like:


Notice that there is a folder icon shown in the list just depicted. It happens to contain several "little movies" or clips under the umbrella title "All You Have To Do Is Listen." I can access all those little movies in iPhone Safari simply by tapping on the folder icon shown above. Folders and subfolders (and sub-subfolders, etc.) work just fine in this methodology.

So ...  still in Safari on my iPhone, I now just have to tap a listed movie — I'll choose Milk (2008).m4v — and I'll see something like this on my iPhone's screen:


It's playing in Safari on my iPhone, using the iPhone's copy of QuickTime! (This fact, by the way, tells you that only movies that are in a QuickTime-playable format will work when you are using this method.)

If the QuickTime controls don't vanish in a few seconds, by the way, tap the iPhone's screen to make them vanish (after hitting the Play button if the movie is paused). When you are done watching the movie, tap the screen again to bring up the controls, then tap "Done" at upper left.

This works, as far as I know, for any QuickTime-playable movie that will play successfully in iTunes on the Mac ... including those video files shown as "Protected" in iTunes, meaning that they use DRM (digital rights management) to prevent unauthorized copying.

Cool, no?

What about TV Shows?

If you have TV shows in your iTunes library, as I do, they're not in Movies but in the TV Shows porton of iTunes. Here's how I set up to stream those:

  • My Mac's URL was, of course, still the same: http://10.0.1.12/.
  • In Terminal, I typed cd /Library/WebServer/Documents/.
  • I used the iTunes "Show in Finder" trick to open a Finder window for one of the items in the TV Shows folder within, in my case, my iTunes Library/iTunes Music folder. (Make sure you are looking at TV Shows and not Movies this time.)
  • In Terminal, I typed in ln -s (note the embedded and trailing spaces).
  • I dragged the TV Shows icon from the top of the Finder window opened two steps ago and dropped it into the Terminal window, and then (this is important!) I typed another space.
  • I typed TVShows (without an embedded space!) into the Terminal window, and pressed Enter.
  • In Safari on the iPhone, I entered the URL http://10.0.1.12/TVShows to bring up a list of files and folders representing, this time, my iTunes TV Shows collection.

Now I had two different 10.0.1.12-based URLs  to remember in Safari on the iPhone, so I bookmarked them both in a Bookmarks folder.

I could have repeated the entire procedure above with any other folders on my Mac that contain QuickTime-playable videos, simply by changing the alias from Movies or TVShows to something unique, such as MoreMovies. Unfortunately, though I have a large collection of movies that I can play (with on-the-fly format conversion) on my iPhone using the Air Video app, few if any of them are QuickTime-compatible. They can't be streamed to my iPhone using the Safari/QuickTime method documented here. (But they can be streamed by the method I talked about in The Marvelous Air Video App: It Streams Videos from Your Mac or PC to iPhone/iPad/iPod Touch.)

This method also works, as far as I know, on an iPod Touch or an iPad.

What about Connecting Remotely?

If you are near a WiFi hotspot away from home, this method will work just as it does when you are near your home WiFi router. It may not, depending on speed limitations imposed by the hotspot in question, work as reliably and smoothly as it does in your house. But it does work.

To get this all to work when I'm out and about, I created a free account at DynDNS.com. Then I created a DynDNS "hostname" via visiting this page.

I chose dalekhound as my hostname, since I'm a Doctor Who fan. (The Daleks are one of the Doctor's most grievous enemies, and the "hound" part refers to an early Doctor's canine helper, the robotic "K-9.")

As I was setting up the dalekhound hostname at DynDNS, I made sure to click on Your current location's IP address is ... in order to make sure DynDNS had fetched and was using the current IP address of my router — not that of my computer. I also visited the DynDNS Support page and clicked on the button allowing me to download the DynDNS Updater software. Once installed and set up on my Mac, DynDNS Updater keeps track of my router's IP address and notifies the DynDNS site if it changes.

After setting things up in DynDNS, I was able to browse in Safari on my iPhone to the URL http://dalekhound.webhop.biz/Movies/ to see my iTunes Movies list, or to the URL http://dalekhound.webhop.biz/TVShows/ to see my iTunes TV Shows list. I could do this from any browser on any platform in any location that has a usable WiFi hotspot ... including Safari on my iPhone at, say, my local Panera.

Once a list was visible in iPhone Safari by means of linking to my Mac via this dynamic DNS name, dalekhound.webhop.biz, I could tap any video to play it or tap any folder to open it.

In Safari on the iPhone I also bookmarked, in addition to the two URLs I set up earlier for use at home, these two URLs to be used remotely: http://dalekhound.webhop.biz/Movies/ and http://dalekhound.webhop.biz/TVShows/.

There's no law against using the same remote URLs while in range of your home WiFi network, by the way.

Connection Problems

After I filed the above, I tried using the remote URLs from Safari on my iPhone once again and found to my surprise that those URLs had stopped working! To get them working again, I found I had to use "port forwarding," a.k.a. "port mapping," on my router.

If you have connection problems, you may need to do the same.

To diagnose my own connection problem, I first went to Why can't I connect? at the DynDNS website. It had me run some tests, which were all successful, then led me to the Loopback Connections page, where I was given a brief rundown on how computers behind a router might have trouble using a DynDNS "webhop" URL. It then urged me to use information given in Routers and Port Forwarding to configure my router to "forward" one of its so-called "ports" to my iMac.

So ... port forwarding is a thing that is done by means of configuring your router. My router is an Apple AirPort Base Station. Every router model has a different way to set up port forwarding, so the way I did it with mine would not necessarily work for yours, and I won't go into any more detail about that. You may need to visit PortForward.com for a detailed guide on how to configure your router's port forwarding features.

Speaking very generally, then, I set my router up to forward the public TCP port whose number is 80 (this is the default port number for the Personal Web Sharing service) to the computer whose private IP address is 10.0.1.201, using the private TCP port whose number is also 80.

I also had to tell Network Preferences on my iMac itself to configure my iMac's network connection Using DHCP with manual address. The manual IP address I chose was 10.0.1.201, to match that which I specified in setting up port forwarding on my router.

Once I did all that, my DynDNS URLs began working again in iPhone Safari!

I have no idea why those URLs worked at first and then stopped working. I don't really understand why port forwarding fixed the problem. But it did ..

By the way, I did not have any connection problem when using the local IP address 10.0.1.12, but after I started doing port forwarding, I had to change the local IP address to 10.0.1.201 in the relevant bookmarks in Safari on my iPhone to get them to work. This was because I had intentionally changed the IP address of my computer from 10.0.1.12 to 10.0.1.201.

Poor Remote Performance

A few days after I filed this post, I got my first chance to try streaming iTunes movies to Safari/QuickTime on my iPhone when I was logged in via remote WiFi hotspots. It was a big bust! Remote performance was terrible!

I tried two hotspots, one in a nearby Panera and one in a local public library. Neither hotspot would stream movies to Safari on my iPhone in any kind of playable fashion.

I have two types of movies in my iTunes library: DRM-protected and non-protected. The non-protected movie I tried was "Harvey," starring James Stewart, a rip of a DVD (which I own) that I made using HandBrake and then converted to iTunes-playable format. It wouldn't start playing over either remote WiFi connection.

Nor would a DRM-protected copy of "Secretariat," purchased from the iTunes store.

Both these movies play just fine in iPhone Safari when I'm connected to my home WiFi setup.

Moral of the story: Some remote WiFi connections appear to be too slow to stream iTunes movies to an iPhone.


More about Remote Performance


It's been a couple of weeks since I wrote the above about "poor remote performance," and I need to amend it. I have changed the way my Mac connects to my home router. Now I'm using just an Ethernet connection from Mac to router, where before I had both that and an 802.11 wireless connection active on my Mac. I changed my connection setup in my Mac's Network Preferences to see whether it would speed up movie streaming to my iPhone, and it did.


Now I can go to (say) Panera or my public library or even my barber shop (where there is no accessible WiFi hotspot) and stream video remotely to my iPhone. I can do it the way I described in this post, or I can do it the way I talked about in The Marvelous Air Video App: It Streams Videos from Your Mac or PC to iPhone/iPad/iPod Touch. I can use a WiFi or 3G connection. I'm not saying the video never freezes, waiting for more data to be buffered from afar. But that's ultra-rare with WiFi, and it happens very seldom with 3G, as long as I have enough "bars" and not too weak a signal.


The lesson here is that remote playback success depends on the end-to-end connection speed and will profit by your eliminating any roadblocks and bottlenecks in your local network at home.

Wednesday, June 30, 2010

Stream Your Music with iSub and Subsonic

iSub is pretty amazing. This app for your iPod Touch or iPhone plays music stored on your computer wherever you go, provided you can get online using a WiFi connection or (with an iPhone) AT&T's 3G network. So anywhere you can get online, you can play your music with iSub ... and you do not have to "sync" your music to your mobile device in order to do so.

iSub works with Subsonic, a music-streaming background server application that runs on a Mac, a Windows PC, or any computer running Linux or Unix. I run Subsonic on the iMac which houses my iTunes music library, so what follows in this post is basically Mac-oriented.

The combination of iSub and Subsonic does approximately what the Simplify Music software suite does, as covered in this earlier Simplify Media 2 post. The Simplify Music 2 client app for the iPhone and iPod Touch is roughly equivalent to iSub in functionality, while the Mac-based version of the Simplify Media 2 desktop server software (there are different versions for different computer platforms) is roughly equivalent to Subsonic. Unfortunately, Simplify Media's developers have pulled the plug on the suite of software, so the Simplify Music iPhone/iPod app is no longer available from the App Store. That's why the advent of iSub is so timely now.


Getting Started with Subsonic


Getting Subsonic up and running on your Mac so that iSub will have access to your music collection isn't all that easy, sad to say. Downloading the Subsonic installer package, installing the software, and running Subsonic for the first time are simple enough, of course. (The Subsonic installation instructions for various computer platforms are available here.) Once Subsonic is downloaded and installed in your Mac's Applications folder, you fire it up in the ordinary way, by double clicking on its Finder icon. The Subsonic app itself is minimal-to-the-max, though, because once it is up and running, you're going to interact with it not as an application but through your web browser (!).

For the record, here is what the Subsonic application's window looks like, when it's not hidden entirely (as normally it will be):


In other words, the Subsonic application is really just a background "media server." It sits there on your Mac and waits until some "client" — on the same Mac, on another computer, or on some other device anywhere else in the wired or wireless world — connects to it.

To connect as a client to the Subsonic server on the same Mac computer that the server is running on, you need to open in your web browser the web page whose URL is http://localhost:4040. The web page is one that the Subsonic application itself makes available. The "4040" designation is crucial to its availability, but taking advantage of it requires some preliminary setup.

(On other OS's the URL that you need to point your browser to is often exactly the same: http://localhost:4040. However, Windows is different; you need to point your browser to just http://localhost, without the "4040" designation. I can't comment on how easy or hard it is to get Subsonic up and running on Windows using that URL. What follows is, as I already said, basically Mac-oriented.)

The "4040" designation is a "port number": an arbitrary numeric designation that the Subsonic server on the Mac (and on several other OS's, but not on Windows) uses to identify itself to, and to communicate with, its clients. Its clients may include:

  • a web browser running on the same computer the Subsonic server is running on (which I'll call the "server host")
  • a web browser on any other computer
  • an iPhone running iSub
  • etc.

So you have to make sure that the server host (the computer running the Subsonic media server application) makes port number 4040 visible to the outside world. The ordinary way to do that is to configure "port forwarding," a.k.a. "port mapping," on the router connected to the server host — my router is an Apple AirPort Extreme base station — to forward all network traffic received from or sent to a Subsonic client, such as iSub on my iPhone, from the router to the server computer, using (you guessed it) port number 4040.

Port numbers are like "attn.: Ms. Smith" beneath the address on an envelope. They make sure incoming messages get routed to the right computer: Ms. Smith's or Mr. Jones's. The port number, in addition, makes sure it gets delivered to the right application or media server running on that computer.

However, Ms. Smith might have, in effect, been replaced by Mr. Jones. Port mapping on the router takes care of this. The router "knows" to replace "attn.: Ms. Smith" on incoming messages with "attn.: Mr. Jones."

So the router has to know in advance what "attn. designees," i.e., port numbers, to expect to see, and whether to treat any of the designees as an alias for one of the other designees.

I ran into difficulty getting port mapping on my Apple AirPort Extreme base station set up properly to forward port 4040's traffic to my iMac computer that is running the Subsonic server. I ran out of patience with that process, which involved using the somewhat arcane Apple AirPort Utility, and sought another, easier solution. I found one in ...


Lighthouse


Lighthouse is a "dynamic port forwarding utility." (It runs on Macs only —if you are using Windows, hopefully http://localhost "just works" without any special attention to port forwarding.)

A dynamic port forwarding utility is software that does network port mappings/forwardings without you having to touch the configuration of your router.

If you purchase Lighthouse ($12.99), download and install it, and start it up on your Mac for the first time, you'll be presented with an informational screen that clues you in to a crucial fact: Lighthouse is not really an application per se! Rather, when you run it, it turns itself into an icon in your Mac menu bar that, when clicked, gives you a drop down menu like this one:


After dealing with the niceties of the "Registration..." menu item — you do need to register Lighthouse, receive a registration code in e-mail, and enter the code into the "Registration..." dialog, so that Lighthouse will keep working after its 14-day trial period has expired — you'll need to select "Edit Port Mapping Profiles...". That produces a window like this one:


The above is my own "Edit Port Mapping Profiles..." window after I'd created the "Subsonic" profile that is highlighted in the top part of the window. I created that profile by clicking the + button beneath the profiles list in the top part of the window (which comes pre-loaded with a number of other profiles that you can simply ignore).

Clicking that + button yielded a new profile called "Empty Profile." I next double clicked the "Empty Profile" name and replaced it by typing the name "Subsonic." I then double clicked the Description area next to "Subsonic" and entered "A profile to make Subsonic work" ... though, be it noted, both the name of the profile and the description can be whatever you wish to make them.

Then, with the "Subsonic" profile still highlighted in the top part of the "Edit Port Mapping Profiles..." window, I clicked on the + button beneath the bottom part. That yielded a new set of Profile Details that I then edited manually:

  • I double clicked on the default Public Port number, which was "1"," and changed it to "4040"
  • I did the same for the default Private Port number, making it "4040" as well, basically saying that port 4040 is not an alias for a different port number
  • I made sure the Type designation was "TCP" (which was, in fact, the default designation)

Then I clicked on the "Enable this profile" check box to ... well, to enable the profile, so that it could be "started." Next, I clicked the Change button, bringing up a standard Mac OS X File Open dialog that allowed me to select the Subsonic application residing in my Applications folder. Doing that step set things up so my newly created "Subsonic" profile would automatically get "started" — i.e., activated — every time my Subsonic application is launched. (In Account Preferences on my Mac, I have manually set up the Subsonic application as a Login Item for my main user account, so Subsonic now gets launched automatically whenever that account gets logged into. That happens by default each time I restart my Mac. Accordingly, unless I intentionally use the Lighthouse "Stop Profile" menu item to stop the Subsonic profile, that profile always stays on.)

Since Subsonic was already running at the time I set up my "Subsonic" port mapping profile in Lighthouse's "Edit Port Mapping Profiles..." window, I needed to click on the Start Profile button in that window to manually begin using port 4040 in the intended way.

Then I simply clicked the Save & Close button in Lighthouse's "Edit Port Mapping Profiles..." window. It was time for ...


Using Subsonic


With all that done, I could finally access http://localhost:4040 in my Safari web browser. That brought up:


What was wanted was for me to enter "admin" as both username and password. But instead of doing that, I clicked on the blue "here" hotlink. That brought me to http://localhost:4040/index.view:


(Entering "admin" as both username and password in the Subsonic login page takes you to that  same "Getting started" page.)

Once you are on the "Getting started" page, you can, by clicking "Change administrator password," link to another web page that allows you to respecify the administrator password — an excellent idea. You just click the "Change password" check box on that page, enter the desired new password, confirm it, and click Save.

You'll then be taken back to the Subsonic login page so you can re-login as username "admin" with the new password that you have just chosen. That, in turn, takes you back to the Subsonic "Getting started" page — which is also, by the way, the default Subsonic "Home" page — so that you can now click "Set up music folders" and point Subsonic at your music folders.

You'll then see this Subsonic Music Folders settings page:


The first time you use this page, all you'll see are two empty "Add music folder" boxes (in the screenshot above, I've already set up a music folder). In the leftmost box (the "Name box") you'll just enter an arbitrary name; I used "iTunes Music." Into the rightmost box (the "Folder box") you'll enter a fully qualified path to a folder containing (either in itself or in its subfolders) all your iTunes music files.

Tip: to enter a fully qualified path name into the box the easy way, just drag an icon of the folder from a Finder window to the Folder box in the Subsonic Music Folders settings page.

The associated "Enabled" box should, by default, already have a check mark in it, but if it doesn't, you can just click on it to give it the check mark. Then click Save, and Subsonic will immediately recognize all the music files in that folder and all its subfolders!

Here's my full Subsonic Music Folders page showing, along its left side, my entire music collection, organized alphabetically by artist name (click the image to enlarge the image):


(For simplicity's sake, I'm ignoring the fact that Subsonic can also use music files in formats that iTunes cannot. If you have such files on your computer, chances are they are in a different folder than the one your iTunes music files reside in — and you'll need to repeat the Music Folders designation process you are now doing in order to make Subsonic aware of that second folder. In fact, you can repeat this "Add music folder" set of steps as many times as necessary to point Subsonic to all the music folders on your computer.)

From this point on, you'll see on the left side of every Subsonic web page (as long as you're logged in) an alphabetical list of all the artists represented in your music collection. If you like, you can now start experimenting: click on, say, the letter "M" to bring up a list of artists whose names begin with that letter.

If I do that, I find that one of my "M" artists is "The Mamas and the Papas," and if I click on it, I see:


If I click on the particular entry for the album eponymously called "The Mamas and the Papas," I get:


Now if I click the little triangular Play icon to the left of "Trip, Stumble & Fall," the song begins to play, and I see (click to enlarge):


Notice that the song has automatically been added to the "Player 1" playlist shown at the bottom of the window, so I can if I like continue adding songs to the same playlist and then save the playlist for future use ... however, the use Subsonic playlists is beyond the scope of this particular blog post, sorry.)

I do need to point out, though, that neither Subsonic nor iSub can utilize the playlists you have in iTunes.

Now it's time to talk about how to set up Subsonic to play your music, not just from the browser interface on the Mac running the Subsonic server, but from apps like iSub that interact with the server remotely over the Internet.

To do that, you'll need to go back to the Subsonic "Getting Started" page. You can do this by clicking on the "Home" icon at the top of every Subsonic browser page (or, click http://localhost:4040/index.view).


Configuring Subsonic's Network Settings


On the "Getting Started" page, click on "Configure network settings" to bring up (click to enlarge):


The key thing here is the "Access your server over the Internet using an easy-to-remember address" check box. You'll need to check it, fill in the empty http:// box with a (hopefully) unique nodename — I chose a version of my name: "epstewart" — and click Save. (If you choose a nodename that someone else is already using, presumably you'll be asked to choose a different nodename.)

What setting up this nodename buys you is that it "hotwires the Internet" so that the URL http://nodename.subsonic.org — modified to contain the actual nodename that you've specified, of course — works wherever you are, on whatever computer or other Subsonic client you happen to be on. (Subsonic calls http://nodename.subsonic.org your "personal server address," by the way)

Keep in mind that that you will need to contribute money to Subsonic to be able to keep your nodename alive permanently. Go to the Subsonic website and, somewhere on just about any page, find the PayPal button. Click on it. You will be taken to a page in which you can log into your PayPal account to make the donation. The default amount of the donation is 20 euros, which (depending on the current exchange rate) comes to about $25.

Or, if you don't have a PayPal account, you can alternatively click on a link, found on the first PayPal page that you come to, that will allow you to donate with just about any credit card.

Once you donate, you'll receive e-mail with a license key in it. Copy and paste the license key into the page brought up by clicking on "Donate" link in the top right corner of the Subsonic web browser interface. Once you do that, the "Donate" link will disappear, and you're good to go.

Note also that, on the "Configure network settings" page, it is quite all right for the status shown beneath "Automatically configure your router to allow incoming connections to Subsonic" to show "no router found." Because you are running Lighthouse on your Mac, you do not depend on a router to do port forwarding. The status of Subsonic's "automatically configure" function is irrelevant.

What's more, you do not need to put a check mark in the "Automatically configure your router to allow incoming connections to Subsonic," if you don't want to.


Adding Users to Subsonic


Next, you'll probably want to create at least one Subsonic user identity other than "admin." Inasmuch as you are currently logged in as "admin," to do that you'll just click on the Settings button at the top of any Subsonic page, and then, in the page which comes up, you will click on "Users" in the row of options immediately below the "Settings" page title.

I did this, chose "New user" in the "Select user" menu, filled in some further information, and got (click to enlarge):


Notice that I put check marks in all the boxes, so this particular user (me) will be able to take advantage of all of Subsonic's capabilities (including being a Subsonic administrator). Also:

  • I left "max bitrate" set at "No limit." Alternatively, I could have limited myself to any one of several streaming bitrates from 32 Kbps to 320 Kbps.
  • My chosen username was "epstewart," which happens to match the Internet nodename I used earlier in this procedure, though strictly speaking it doesn't have to.
  • I entered a password of my choosing and confirmed it.

I then clicked the Save button to register user "epstewart" with the Subsonic server running on my Mac. I could now log out of Subsonic as "admin" and log back in as "epstewart," using this login page (click to enlarge):


Notice that I checked the "Remember me" box so that Subsonic would remember my "epstewart" username, along with my associated password.

When I next clicked the "Log in" button, Safari too asked me if I wanted it to remember my "epstewart" login details; I responded in the affirmative. (To get Safari to be able to fill in the username and password boxes automatically, I needed to check the "User names and passwords" option in its Autofill Preferences panel.) Now, whenever I bring up the Subsonic login page in my Safari browser, "epstewart" is filled in automatically in the username field, and my password is filled in in the corresponding password field as well.

Logging in to Subsonic as "epstewart" for the first time brought me back to the familiar Subsonic "Getting started" page. After that initial login, though, logging out and logging in again return me to whatever I was doing when I logged out. Subsonic remembers what each user is doing at the time of logging out.

It's actually a bit more complicated than that; for one thing, each user is given access by Subsonic to, potentially, any of several music "players" that have been created to hold playlists. Subsonic calls each player by a unique name, "Player n," where "n" is always a unique number across all registered users. If "epstewart" logs out on Computer A while "Player 2" is active, but has previously logged out on Computer B while "Player 3" is active, logging back in on Computer B will return him to "Player 3," the most recently active player that is associated with his username on that computer, Computer B. But if "epstewart" logs back in on Computer A, "Player 2" will be the active player.

If you get tired of always seeing the "Getting started" page, then when it is visible, click Don't show this again. Now, rather then the "Getting started" page, whenever you log in to Subsonic or click on the "Home" icon, you'll arrive at a "Welcome to Subsonic!" page instead. This page, by default, presents you with a continuously changing selection of randomly chosen albums from your music collection. You can click on any album you see, and its list of songs will magically appear, ready for you to play any one of them. Subsonic has lots of niceties like that, but they're best reserved for a different blog post than this one.

Anyway, if you have done all of the above, you are now able to run the Subsonic client interface on any computer, not just the one running the Subsonic server. Just open any browser and type in the URL http://nodename.subsonic.org, replacing nodename with the one you set up earlier.

My nodename is "epstewart," so my URL is http://epstewart.subsonic.org. Your URL will be different, because your nodename is different.

So, to repeat: if I point a browser on any computer to the URL with my epstewart nodename in it, I'll magically see the familiar Subsonic login page! Once I log in as "epstewart," I am then able to find and play all of my music.

Warning: the following brief aside is a bit technical, so if you don't follow it, you can just move on.

The http://epstewart.subsonic.org URL gets automagically changed to http://10.0.1.2:4040/login.view... in the browser URL field. 10.0.1.2 happens to be the current local IP address of my Mac that is running the Subsonic server application. 4040 is the designated Subsonic port number, as discussed earlier. And login.view designates the web page from which you can log yourself, using your username and password, into the Subsonic server.


End of technical aside.

Now it's time to learn about ...


The iSub App

To obtain the iSub app, you need to buy it for $4.99 at the iTunes Store (you can do so by using the App Store app on your iPhone/iPod, or you can just click here an get it online via iTunes).

The following applies to version 2.1.2 of iSub, which is due for an update any day now. It may or may not remain accurate when the new update arrives.

Once iSub is installed on your iPhone or iPod, to begin using it, just tap the iSub icon:


You'll briefly see this screen ...


... and then a list of sample music (or, actually, a list of the artists responsible for this collection of sample music) that you can listen to if you don't yet have your own Subsonic server up and running. You have yours up and running, so you'll just tap the gear icon at the upper left of the Artists screen to bring up the Servers screen. Here is my Servers screen after I had already gotten iSub set up the way I want it ...


... but you'll initially see just an empty list of servers. You'll need to tap the Edit button at upper right, which turns the Servers screen into an editing screen, and then tap the + button at upper left ...


... to bring up ...


... into which you'll enter your Subsonic website name, with its unique nodename, as well as your username and password:


The you'll tap the Save button to take you back to the Servers editing screen, which will now show:


Tap Done at upper right, then tap the entry for the newly defined server, to bring up:


Tap "Make Default Server" to get:


Tap "Ok" and then press the Home button on the iPhone or iPod to take you out of iSub. Then tap the iSub icon again to restart iSub. This time, the Subsonic server you are running on your Mac will provide iSub with a list of the artists in your own music colleciton. Here's mine:


(If you tap the gear icon again to bring up the Servers screen, you'll now see a star next to your server, indicating that it is the default iSub server.)

Let's say I want to find a song by the Mamas and the Papas. I tap "M" in the alphabetical column at the right side of the screen, and see:


I tap "The Mamas and the Pa..." and, voilĂ , I get a list of my (two) Mamas and Papas albums:


I tap "The Mamas and the..." to get the songs from the group's eponymously named album, and get:


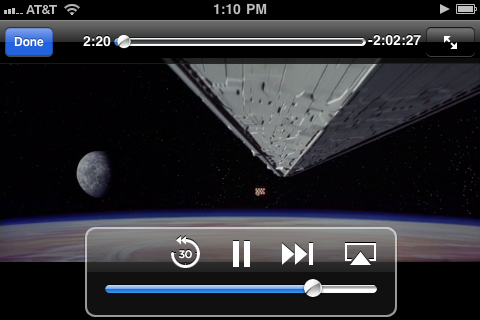
Alas, this album is, in my library, a partial album with only two tracks in it. (Someday, I'll have to get the whole album!) Let's say I want to hear "Trip, Stumble & Fall." I tap its entry in the iSub list and, as the music begins to play, I see:


While the music is playing, I can tap the album cover art to see an Info screen:


Tapping again takes me back to the cover art, but if I like, I can swipe the Info screen to the left to see a list of all the songs (all two of them, in this case) on the album:


You can tap any of the songs to play that song. Or, swiping the screen to the left once more brings up a screen showing the status of iSub's buffer:


Here, the buffer is full, since 383/384 indicates a very nearly full buffer. If the top number is noticeably lower that 383, the buffer isn't full. If it's quite a bit lower, its green color will turn amber. If it's close to empty, red.

iSub (version 2.1.2, at least) is implemented in such a way that as each song ends, the buffer drains to 0/384. Then as the next song begins, the top number builds from 0 to 383 (or higher) again. I'm telling you this because you'll find that iSub 2.1.2's inability to pre-buffer the next song can in certain situations cause long pauses between songs.

Anyway, once the song(s) you want to play are finished, you can tap the left-pointing arrow button at upper left of the screen multiple times to bring you back to your Artists list.

From there, you can tap the Albums icon along the bottom of the screen to see:


From the Albums screen you can navigate to whatever music you want to hear and play it, exactly as in playing music from the Artists screen.

In theory, you can tap the Songs icon at screen bottom to bring up a list of all your songs. However, that doesn't work for me. Ben Baron, the developer of iSub, has told me that there is some sort of mismatch between iSub version 2.1.2 and Subsonic that causes iSub to have "a hard time loading large collections such as yours [I have over 14,000 songs in my collection] because of the method used to grab the songs from Subsonic. I've completely rewritten the song loading algorithm for the upcoming version 2.2 so that it no longer has this problem ... ".

iSub also has the ability to utilize playlists you create in Subsonic in a web browser ... but Subsonic's playlists capability is beyond the scope of this already-way-too-long post.

I wish you satisfying iSubbing ...